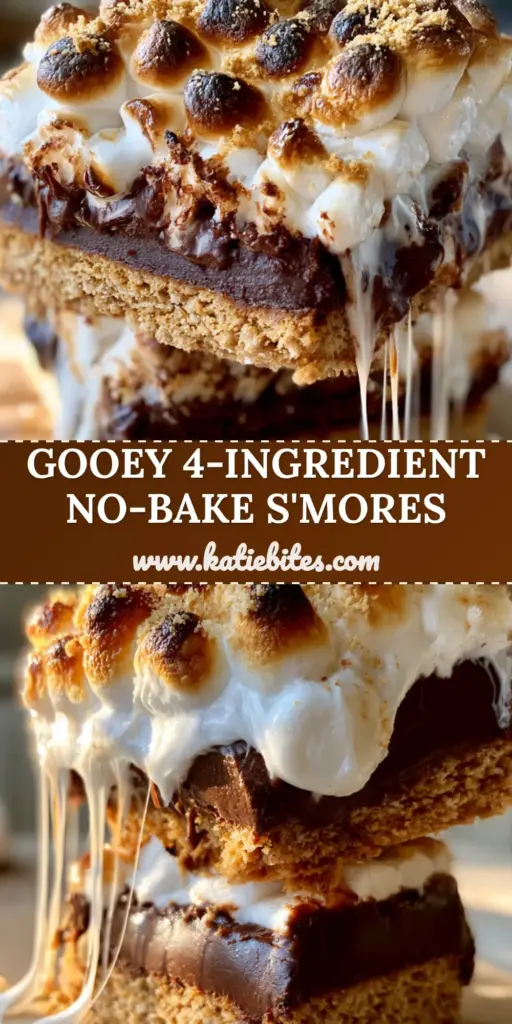
There is a specific, primal joy that comes from pulling a decadent treat apart and seeing those long, shimmering strings of melted marshmallow stretch into a delicate web. These s’mores bars aren’t your average campfire substitute; they are a sophisticated, structurally engineered masterpiece designed for the true dessert enthusiast.
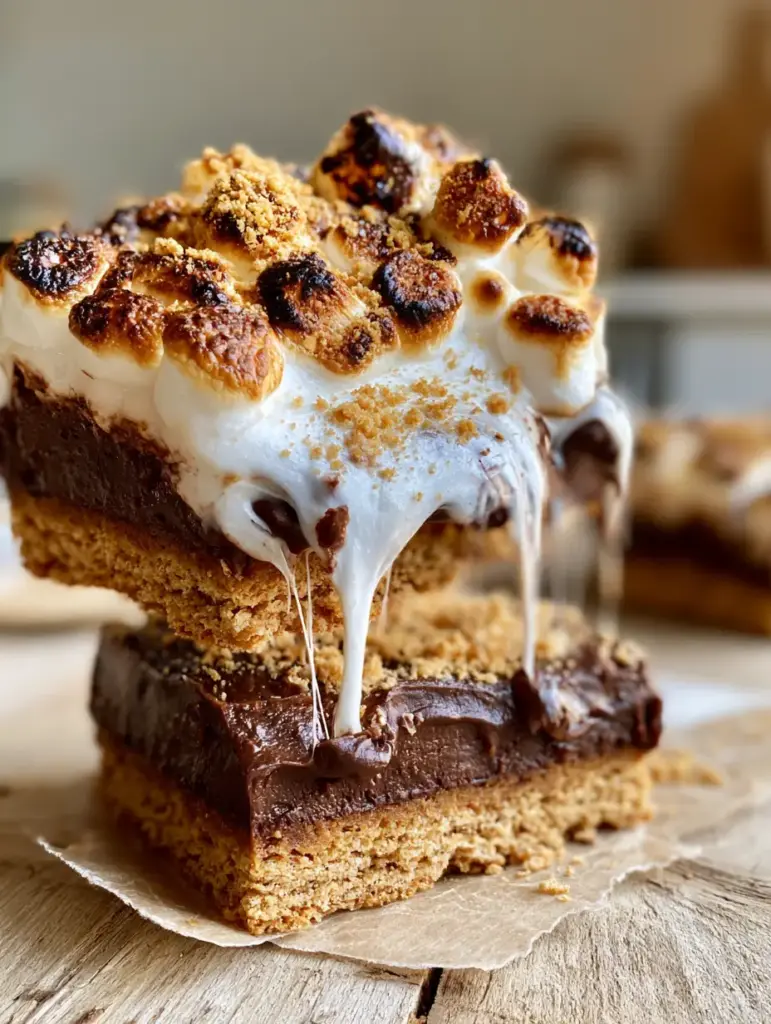
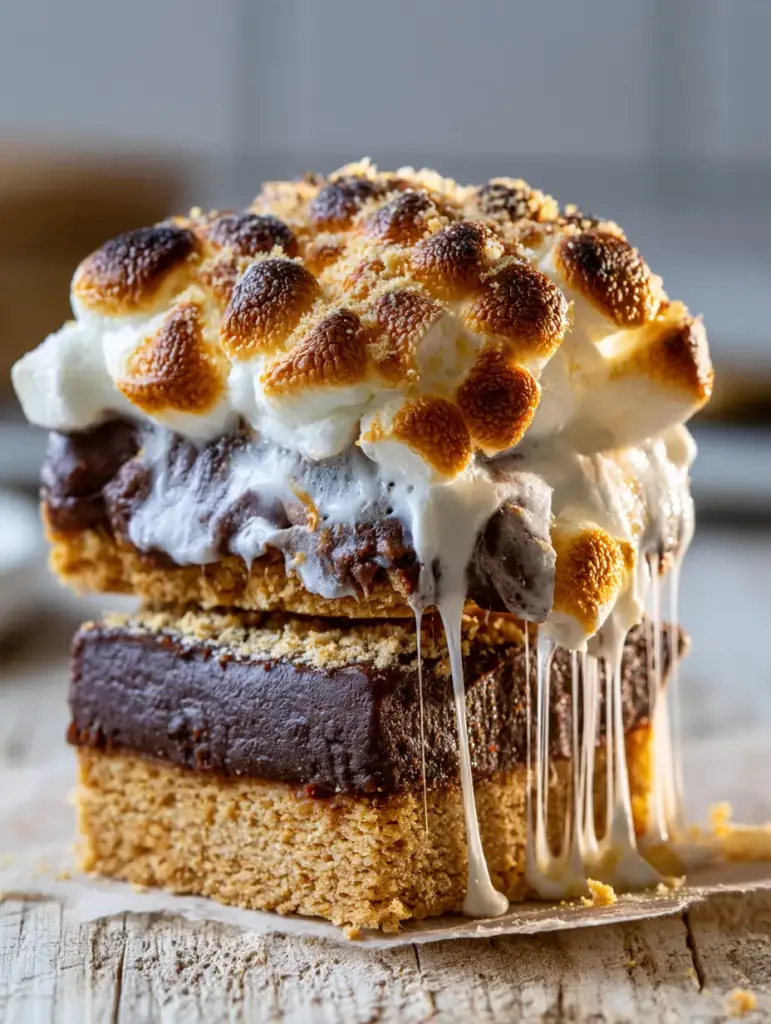
Every bite of these s’mores bars offers a vertical journey through textures, starting with a coarse, buttery graham cracker base that provides a satisfying crunch. This is followed by a legendary one-inch thick layer of semi-sweet chocolate ganache that remains glossy and rich, providing the perfect weight to anchor the mountain of toasted marshmallows on top.
The crowning glory of this recipe is the charred, golden-brown finish on the mini marshmallows, achieved through precision heat that creates deep amber peaks and melting, snowy-white sides. Finished with a fine dusting of graham cracker crumbs, these handheld bars are a visual and sensory triumph that bring the nostalgia of a summer bonfire into the modern kitchen.
Why These Decadent S’mores Bars Outperform the Rest
- The 1-Inch Ganache Standard: Unlike thin chocolate layers that snap, this dense ganache provides a fudge-like mouthfeel that stands up to the thick crust.
- Engineered Marshmallow Web: We use a specific layering technique to ensure that every lift results in those iconic, social-media-worthy marshmallow strings.
- Double-Texture Graham Elements: By using a coarse crumb for the base and a fine dusting for the top, we maximize the honey-cinnamon flavor profile of the crackers.
- Charred Perfection: This recipe focuses on achieving “golden-hour” aesthetics with toasted peaks that offer a hint of smoke to balance the intense sweetness.
The Foundation: Essential Ingredients for Structural Integrity
Coarse Graham Cracker Crumbs (360g / 3 cups): The base requires a coarser grind than store-bought pre-crushed crumbs to ensure the crust doesn’t become sandy or fragile under the weight of the ganache. These crumbs provide the structural “floor” for our bars, absorbing the butter to create a shortbread-like consistency.
Unsalted Melted Butter (170g / 3/4 cup): Butter acts as the primary binding agent, saturating the graham cracker fibers to ensure the crust holds its shape when lifted. We use unsalted butter to maintain total control over the sodium levels, allowing the honey notes of the crackers to shine.
Semi-Sweet Chocolate Morsels (680g / 24 oz): To achieve the visual and physical density of a 1-inch layer, a high volume of quality chocolate is non-negotiable. Semi-sweet chocolate provides the necessary cocoa solids to ensure the ganache sets firmly while remaining semi-glossy and rich.
Heavy Whipping Cream (360ml / 1.5 cups): This is the “invisible” ingredient that transforms hard chocolate into a luxurious, biteable ganache. The high fat content in the cream prevents the chocolate from becoming brittle, ensuring those clean, thick edges when the bars are sliced.
Mini Marshmallows (283g / 10 oz): Mini marshmallows are superior to large ones for this recipe because they create more surface area for charring. Their small size allows them to nestle together, forming the “mountain” effect described in our visual blueprint.
Granulated Sugar (50g / 1/4 cup) and Fine Sea Salt (pinch): A small amount of sugar reinforces the crust’s structure through caramelization during the blind bake. Salt is the culinary catalyst that heightens the chocolate’s depth and cuts through the sugar of the marshmallows.
Precision Tools for the Perfect Gooey Texture
To achieve the professional results seen in our handheld smartphone photos, you will need a 9×9 inch (23x23cm) square baking pan lined with high-quality parchment paper. The “torn parchment” aesthetic isn’t just for looks; it allows you to lift the entire block of bars out for clean slicing once the ganache has set.
A kitchen torch is the preferred method for achieving those deep amber and charred golden-brown peaks on the marshmallows without melting the ganache layer underneath. If you don’t have a torch, a high-heat broiler will suffice, though you must monitor it with forensic intensity to avoid burning.
Constructing the Ultimate S’mores Bars Step-by-Step
Forging the Coarse Graham Cracker Base
Preheat your oven to 350°F (175°C) and line your pan with parchment paper, leaving an overhang on the sides. Pulse your graham crackers in a food processor until you have a mix of fine dust and coarse, pea-sized crumbs to ensure a rustic, “golden-tan” appearance.
Mix the crumbs with the melted butter and sugar until the mixture resembles wet sand. Press this firmly into the bottom of the pan using the back of a measuring cup—the pressure is vital for a crust that doesn’t crumble when the bars are lifted. Bake for 10-12 minutes until the edges are just beginning to turn a deeper gold, then let it cool completely.
Mastering the 1-Inch Semi-Glossy Ganache
Place your semi-sweet chocolate in a heat-proof glass bowl. In a small saucepan, bring the heavy cream to a gentle simmer—look for small bubbles forming around the edges, but do not let it reach a rolling boil. Pour the hot cream over the chocolate and let it sit undisturbed for 5 minutes.
Gently whisk from the center outward until the mixture transforms into a thick, semi-glossy, and uniform dark chocolate ganache. Pour this directly onto the cooled crust, smoothing the top with an offset spatula. For the ganache to reach its “dense” 1-inch profile, refrigerate the pan for at least 2 hours until the chocolate is firm to the touch.
The Marshmallow Mountain and Charring Technique
Once the ganache is set, pile the mini marshmallows across the surface in a thick, uneven layer to create “mountains” and valleys. If using a broiler, place the pan on the top rack for 60-90 seconds, rotating constantly until you see the peaks turn deep amber.
If using a kitchen torch, move the flame in a sweeping motion about 2 inches away from the marshmallows. Target the very tops of the marshmallows to create those “charred golden peaks” while leaving the sides white and melting. This creates the visual contrast of fire-roasted treats.
The Final Flourish and the “Lift”
Immediately after toasting, sprinkle a tablespoon of fine graham cracker crumbs over the top. This dusting catches in the melted crevices of the marshmallows. For the perfect “handheld smartphone photo,” slice the bars while they are slightly warm to ensure the long strings of melted marshmallow are at their most elastic.
Expert Tips for Success
- The Clean Cut: To get those perfect 1-inch thick chocolate edges, dip your knife in hot water and wipe it clean between every single slice.
- Avoid the “Sog”: Ensure the crust is 100% cool before adding the ganache. If the crust is warm, the butter will leak out and make the base greasy instead of crisp.
- Parchment is Key: Always leave “wings” of parchment paper hanging over the sides of the pan so you can lift the entire slab out before cutting.
- Salt Balance: Don’t skip the pinch of salt in the crust; it is essential to balance the 24 ounces of chocolate and the sugar-heavy marshmallows.
The Ideal Pairings for Your S’mores Bars
These s’mores bars are a rich, heavy dessert that benefits from being served alongside lighter, more acidic dishes. For a summer party, they pair beautifully with a refreshing watermelon feta salad or a bright mexican watermelon salad.
If you’re hosting a backyard barbecue, serve these after a main course of grilled proteins and a crisp peach arugula salad. For those looking for a complete “summer vibe” menu, consider browsing my curated list of summer dinner ideas to find the perfect savory precursor to this gooey finale.
Frequently Asked Questions
Yes, but ensure they are semi-sweet. Chocolate chips contain stabilizers that help them keep their shape, which actually results in a slightly firmer ganache that is easier to slice into thick 1-inch bars.
For clean edges, refrigerate the bars until the ganache is fully set, then use a sharp knife dipped in hot water and wiped dry between every cut. If you want the ‘gooey’ look, toast the marshmallows just before serving.
The key is pressure and the ratio of butter. Use a flat-bottomed measuring cup to pack the coarse crumbs tightly into the pan. The ‘blind bake’ also helps the sugar caramelize and act as a glue.
These bars can be stored in an airtight container at room temperature for up to 3 days, or in the fridge for 5 days. For the best texture, let them come to room temperature before eating so the ganache softens.
While a kitchen torch gives you the most control for charred golden peaks, you can use your oven’s broiler. Just be sure to watch it constantly, as marshmallows can go from golden to burnt in seconds.
The Ultimate S’mores Bars Recipe
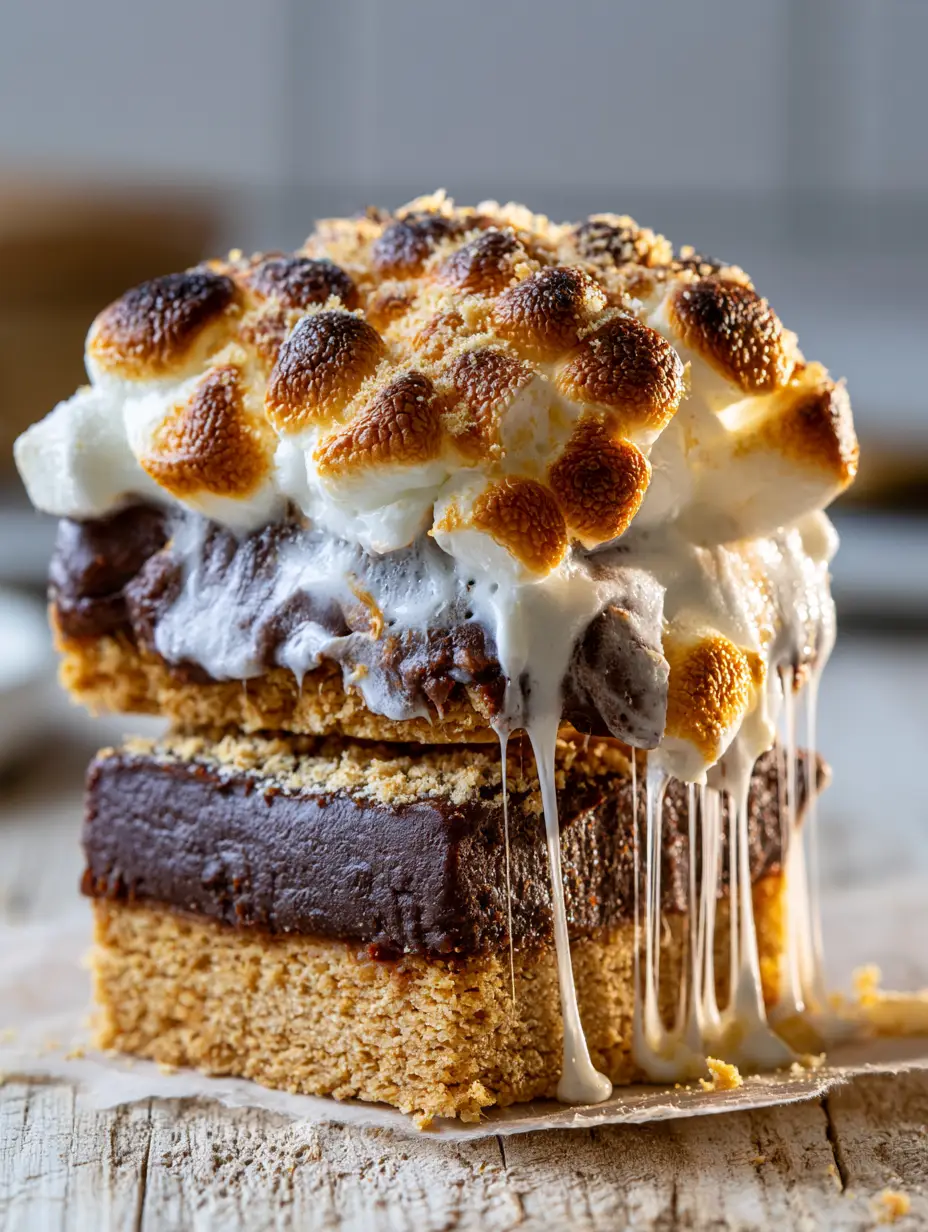
S’mores Bars with Thick Chocolate Ganache and Toasted Marshmallow Peaks
Ingredients
Equipment
Method
- Combine coarse graham crumbs, melted butter, sugar, and salt. Press firmly into a parchment-lined 9x9 pan. Bake at 350°F (175°C) for 10-12 minutes until golden. Cool completely.
- Heat heavy cream until simmering. Pour over chocolate morsels and let sit for 5 minutes. Whisk until semi-glossy and smooth. Pour over cooled crust and refrigerate for 2 hours until set.
- Pile mini marshmallows on top of the set ganache. Use a kitchen torch to char the peaks to a deep golden-brown. Alternatively, broil for 60-90 seconds. Sprinkle with fine crumbs and serve warm for maximum gooey strings.
Notes
Ensure the crust is fully cooled before adding ganache to prevent oil separation.
A Modern Twist on a Campfire Classic
These s’mores bars represent the perfect marriage of rustic nostalgia and professional pastry techniques. By focusing on the 1-inch ganache thickness and the specific “charred” visual cues, you are creating a dessert that tastes even better than it looks on camera.
I would love to see your marshmallow webs! If you make this recipe, please leave a comment below and share your photos on Pinterest. Don’t forget to sign up for my newsletter for more decadent dessert blueprints delivered straight to your inbox.